
Table of Contents
Overview
This page describes how to use the TFTP client on Windows OS. The screenshots on this page are for Windows 10, but the same applies to Windows 11.
Enabling TFTP Client on Windows 10
You can use the TFTP client on Windows 10. You do not need to bother installing a TFTP client application. However, it is not enabled by default. Follow the steps below to enable the TFTP client on Windows 10.
- Open [Windows Features]
- TFTP Client checked and enabled
- Allow TFTP on Windows Firewall
The screenshots of the following steps are for Windows 10; they are almost the same for Windows 11.
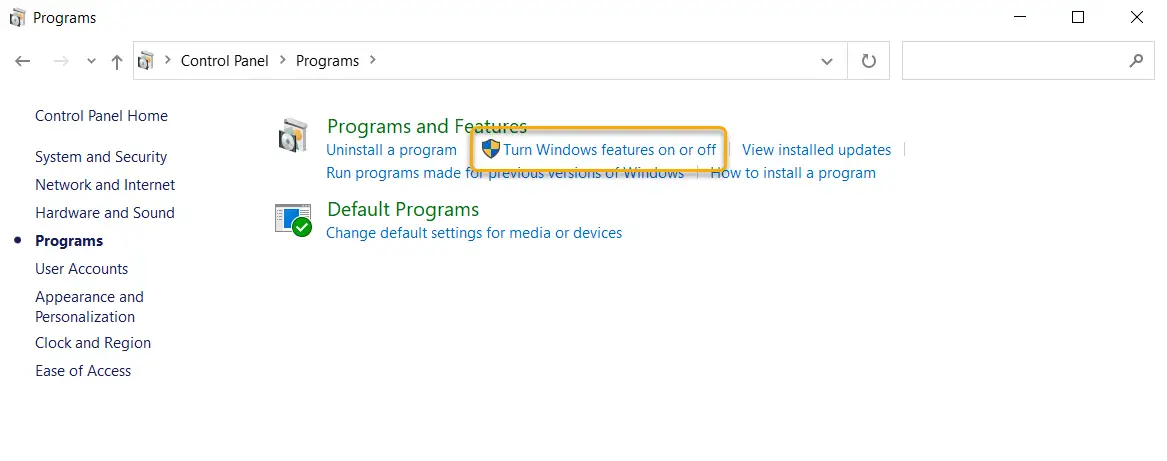
Open [Windows Features]
To enable the TFTP client, do so from the [Windows Features] dialog box. To open [Windows Features], click [Control Panel] -> [Programs] -> [Turn Windows Features on or off].
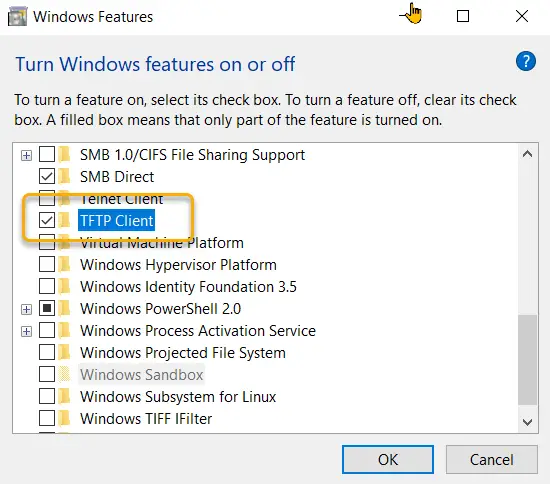
TFTP Client checked and enabled
On [Windows Features] dialog box, check [TFTP Client] and click [OK] to enable the TFTP client. If prompted for a reboot, reboot the system.
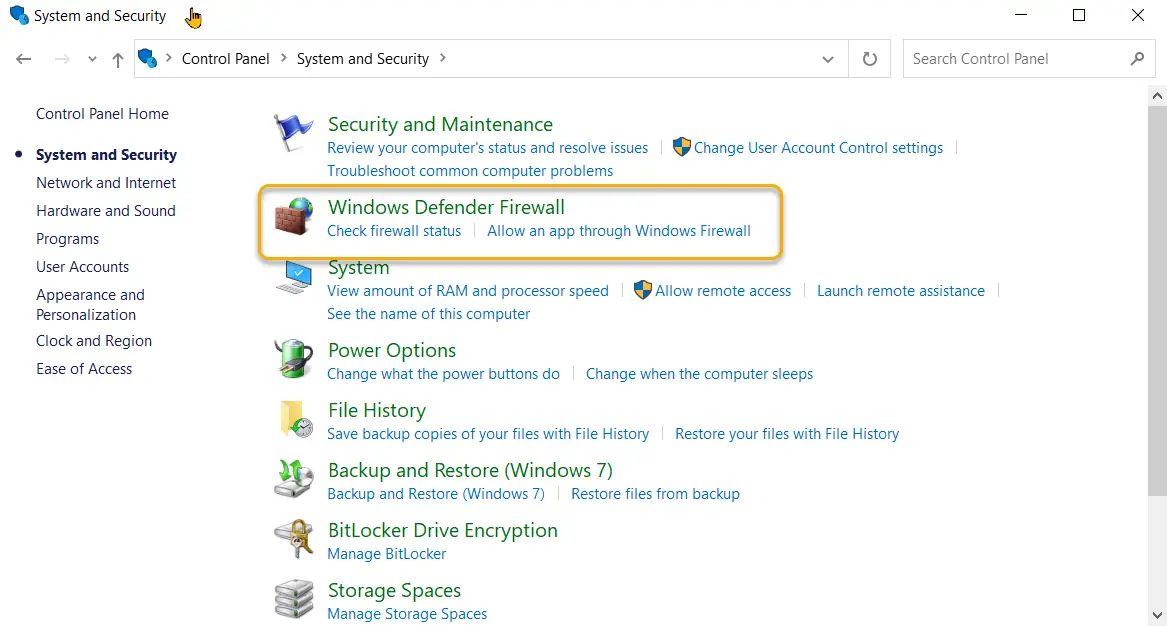
Allow TFTP on Windows Firewall
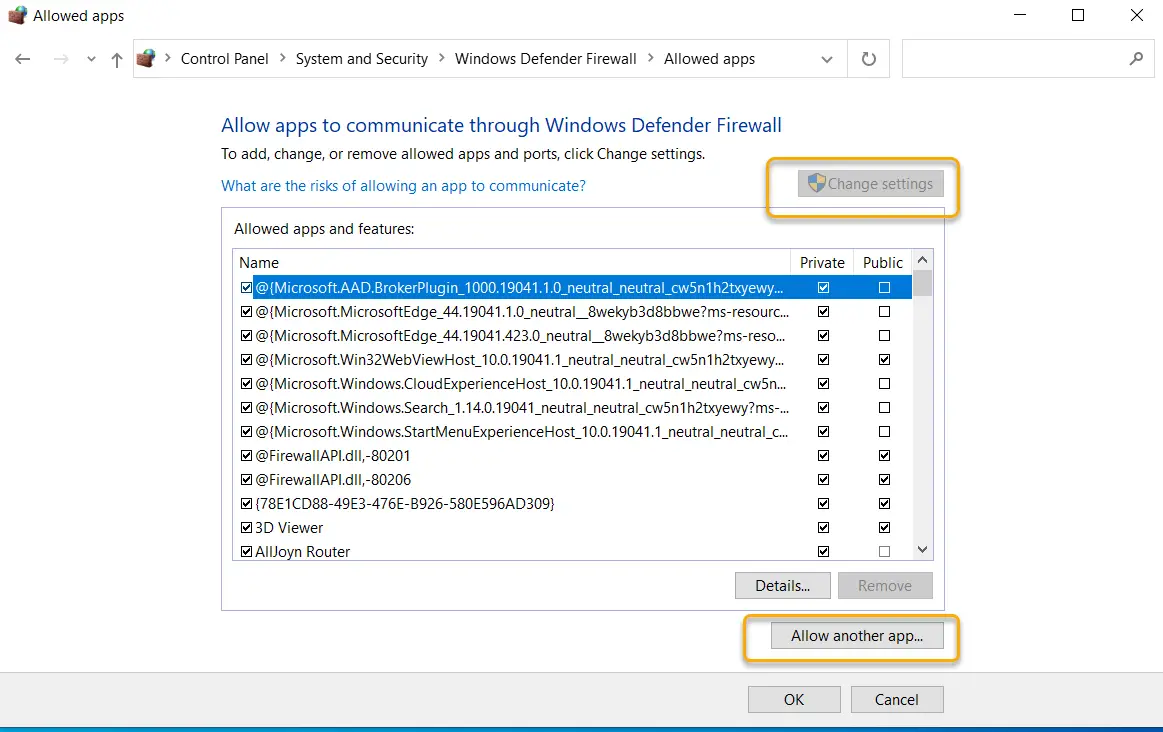
Firewall conditions must be added for TFTP file transfers with an enabled TFTP client. Click on [Control Panel] -> [System and Security] -> [Windows Defender Firewall].
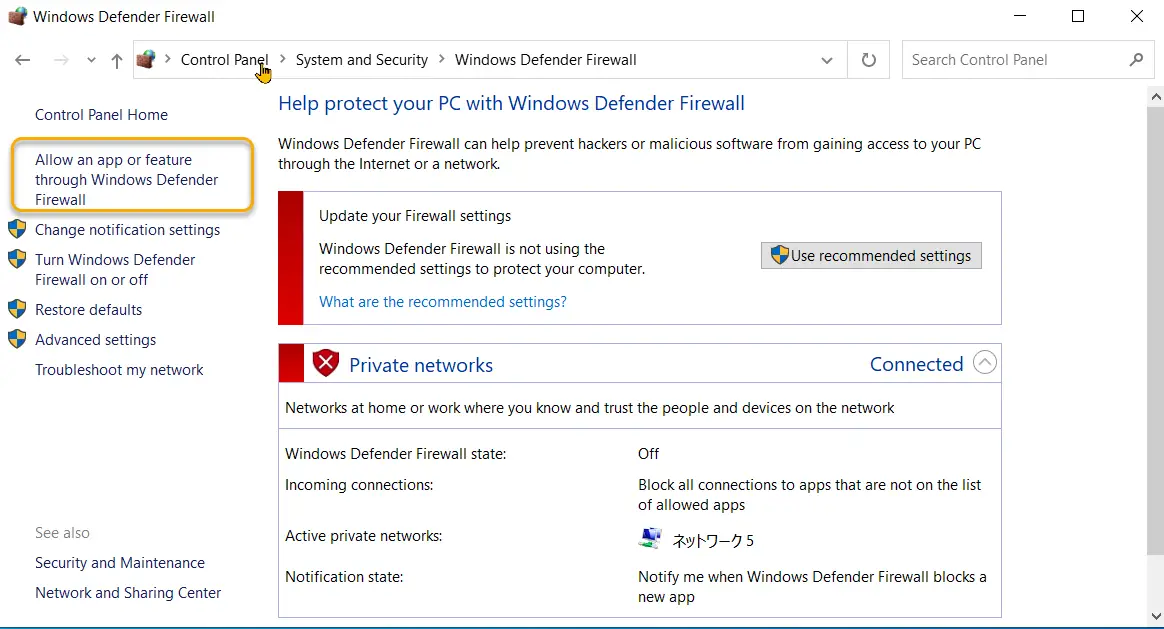
Click [Allow an app or feature through Windows Defender Firewall].
By clicking on [Change settings], [Allow another app] will become active.
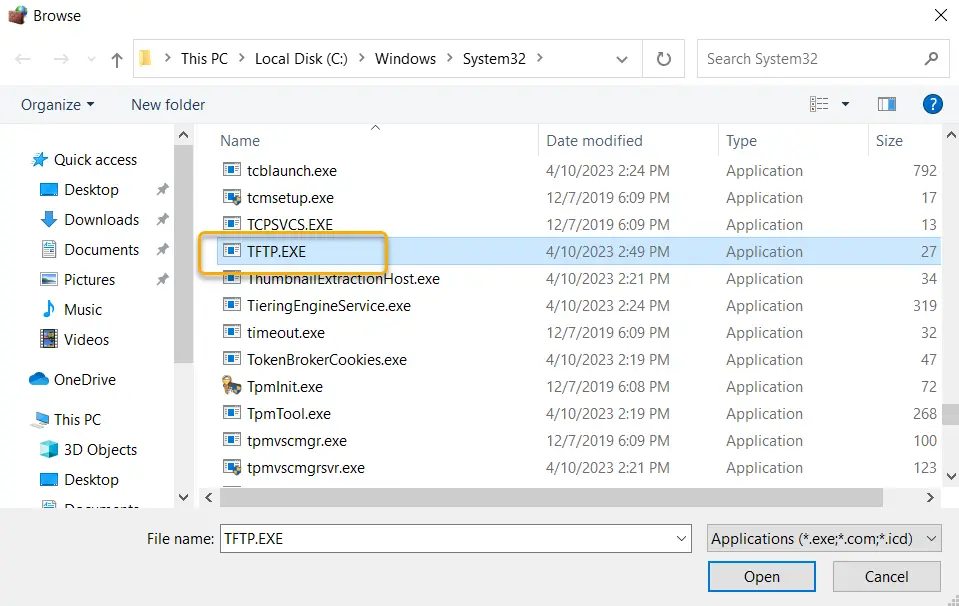
From [Browse], specify the path to TFTP.EXE. TFTP.EXE is located under Windows\System32.

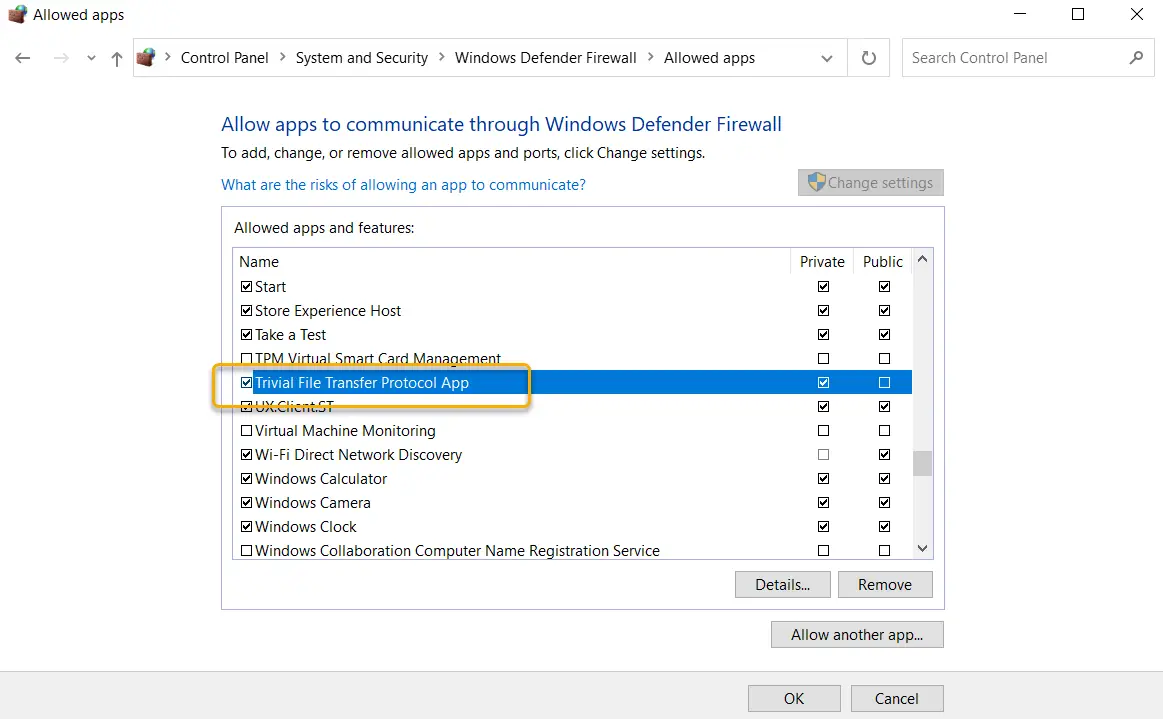
It is OK if [Trivial File Transfer Protocol App] is added to [Allowed apps and features].
If you are using firewall software other than Windows Firewall, please allow TFTP in that firewall software.
TFTP Client Command Syntax
Once the TFTP client is enabled, you can transfer files via TFTP using the tftp command on the command prompt. tftp command format can be found in the help. Below is the help for the tftp command.
C:\Users\Gene>tftp

Transfers files to and from a remote computer running the TFTP service.

TFTP [-i] host [GET | PUT] source [destination]

  -i              Specifies binary image transfer mode (also called
                  octet). In binary image mode the file is moved
                  literally, byte by byte. Use this mode when
                  transferring binary files.
  host            Specifies the local or remote host.
  GET             Transfers the file destination on the remote host to
                  the file source on the local host.
  PUT             Transfers the file source on the local host to
                  the file destination on the remote host.
  source          Specifies the file to transfer.
  destination     Specifies where to transfer the file.
For example, to transfer the file “c1841-ipbase-mz.124-12a.bin” with the TFTP server IP address of 192.168.1.111, enter the following command.
C:\Users\gene>tftp -i 192.168.1.111 get c1841-ipbase-mz.124-12a.bin
Transfer successful:  15788240 bytes in 49 second(s)、322208 bytes/s
The downloaded file is stored in the current directory of the command prompt.
Summary
Points
- TFTP clients can be added from [Windows features].
- Once the TFTP client is enabled, the tftp command is available at the command prompt.
TCP/IP
- IP(Internet Protocol) : The Most Important Data Transfer Protocol
- Ping “Will the data be transfered properly?”
- Ping command on Windows OS
- Traceroute : Which router does the data go through?
- ICMP Redirect
- Where’s the Trouble? Ping and Traceroute
- ARP(Address Resolution Protocol)
- ARP Format
- Gratuitous ARP(GARP)
- nslookup command : Verifying DNS name resolution
- DHCP : Automatically Assign IP Address
- Cisco IOS DHCP Server Configuration and Verification Commands
- Cisco Router DHCP Server Configuration Example
- DHCP Relay Agent
- DHCP Relay Agent Configuration Example [Cisco]
- Summary of DHCP Server Placement
- TCP/IP Configuration Summary
- ipconfig command : To verify TCP/IP configurations on Windows OS
- Commands to Verify TCP/IP Configuration On Linux (Ubuntu)
- Web Proxy Server
- FTP : Representative File Transfer Protocol
- TFTP(Trivial File Transfer Protocol)
- TFTP Client on Windows10/11