Dynagenの主なコマンド
Dynagen上でエミュレートしているルータの管理を行うことができます。次の表は、Dynagenで利用できる主なコマンドをまとめたものです。
| Dynagenコマンド | コマンドの概要 |
|---|---|
| list | エミュレートしている機器を表示する |
| start | ルータを起動させる |
| stop | ルータを停止させる |
| reload | ルータを再起動させる |
| console | ルータのコンソールに接続する |
| telnet | ルータのコンソールに接続する |
| save | ルータのstartup-configを.netファイルに保存する |
| export | ルータのstartup-configをテキストファイルへエクスポートする |
| import | テキストファイルの設定情報をルータのstartup-configにインポートする |
| captre | 指定したルータのインタフェースのパケットをキャプチャする |
以降で、上記のコマンドについて解説します。
目次
list
listコマンドによって、現在エミュレートしているルータを一覧表示できます。
listコマンドの例
-----------------------------------------
=> list
Name       Type       State      Server          Console
R1         3640       running    localhost:7200  2001
R2         3640       running    localhost:7200  2002
R3         3640       running    localhost:7200  2003
R4         3640       running    localhost:7201  2004
R5         3640       running    localhost:7201  2005
R6         3640       running    localhost:7201  2006
FR         FRSW       always on  localhost:7201  n/a
-----------------------------------------
上記のように、listコマンドによってDynagen設定ファイルで定義しているルータ名、モデル、Dynamipsサーバの情報やコンソール接続するためのポート番号がわかります。
start
startコマンドによってエミュレートしているルータを起動させます。startコマンドの後に、起動させたいルータ名を指定します。「/all」と指定するとすべてのルータを起動させます。その際、delayを指定することもできます。
startコマンドの例
-----------------------------------------
=> start /all 5
100-VM 'R4' started
Delaying start of next device for 5 seconds...
100-VM 'R5' started
Delaying start of next device for 5 seconds...
100-VM 'R6' started
Delaying start of next device for 5 seconds...
100-VM 'R1' started
Delaying start of next device for 5 seconds...
100-VM 'R2' started
Delaying start of next device for 5 seconds...
100-VM 'R3' started
Delaying start of next device for 5 seconds...
-----------------------------------------
stop
stopコマンドによりエミュレートしているルータを停止させます。startコマンドと同じように停止させたいルータ名か、/allを指定します。
stopコマンドの例
-----------------------------------------
=> stop /all
100-VM 'R4' stopped
100-VM 'R5' stopped
100-VM 'R6' stopped
100-VM 'R1' stopped
100-VM 'R2' stopped
100-VM 'R3' stopped
-----------------------------------------
reload
reloadコマンドによりエミュレートしているルータを再起動させます。startコマンドと同じように停止させたいルータ名か、/allを指定します。
reloadコマンドの例
-----------------------------------------
=> reload R1
100-VM 'R1' stopped
100-VM 'R1' started
-----------------------------------------
※ ルータのCLIでreloadコマンドを実行しないでください。CLIのreloadコマンドを実行すると、ループしてしまいます。ルータを再起動するときはDynagen上でreloadコマンドを実行してください。
console
consoleコマンドによって、指定したルータのコンソールに接続します。その際、WindowsのTelnetクライアントを利用します。
consoleコマンドの例
-----------------------------------------
=> console R1
-----------------------------------------
telnet
consoleコマンドと同じです。telnetコマンドで指定したルータのコンソールに接続します。その際、WindowsのTelnetクライアントを利用します。
telnetコマンドの例
-----------------------------------------
=> telnet R1
-----------------------------------------
save
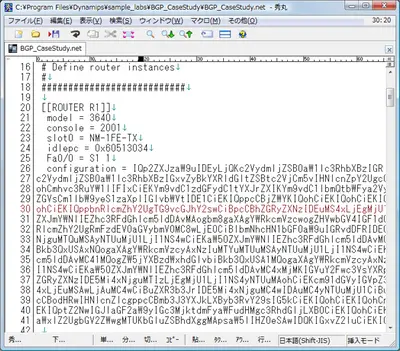
saveコマンドによって、指定したルータのstartup-configを.netファイルの該当ルータのパートに保存します。コンフィグはBASE64でエンコードされます。
saveコマンドの例
-----------------------------------------
=> save /all
saved configuration from: R4
saved configuration from: R5
saved configuration from: R6
saved configuration from: R1
saved configuration from: R2
saved configuration from: R3
saved configuration from: SW1
saved configuration from: BB2
saved configuration from: BB1
-----------------------------------------
.netファイル上では、次のようになります。

図 saveコマンドによる.netファイルへのコンフィグ保存
export
exportコマンドは指定したルータのstartup-configを指定したディレクトリにテキストファイルとしてエクスポートします。エクスポートするファイル名は、「<ルータ名>.cfg」となります。
exportコマンドの例
-----------------------------------------
=> export /all "."
The directory . already exists. Ok to overwrite (Y/N)? y
Exporting R4 to .\R4.cfg
Exporting R5 to .\R5.cfg
Exporting R6 to .\R6.cfg
Exporting R1 to .\R1.cfg
Exporting R2 to .\R2.cfg
Exporting R3 to .\R3.cfg
Exporting SW1 to .\SW1.cfg
Exporting BB2 to .\BB2.cfg
Exporting BB1 to .\BB1.cfg
-----------------------------------------
import
importコマンドは、指定したルータのstartup-configに指定したディレクトリに保持されているコンフィグをインポートします。コンフィグファイルは、「<ルータ名>.cfg」にしておきます。
importコマンドの例
-----------------------------------------
=> import R1 "."
Importing R1 from R1.cfg
-----------------------------------------
capture
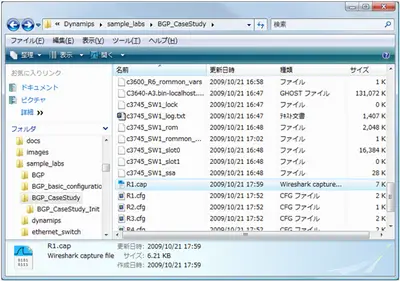
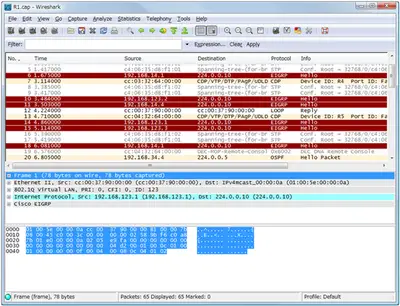
captureコマンドは指定したルータの指定したインタフェースのパケットキャプチャを行います。キャプチャした内容は、.capファイルとして保存されます。Wiresharkで作成された.capファイルを開くことでキャプチャ内容を確認することができます。
パケットキャプチャを終了するときは、先頭に「no」をつけてコマンドを実行します。
captureコマンドの例
-----------------------------------------
=> capture R1 f0/0 R1.cap
=> no capture R1 f0/0
-----------------------------------------

