
Table of Contents
What is GNS3 VM Server?
The GNS3 VM server is a process of the GNS3 server running on a Virtual Machine. According to the official website, running the GNS3 server on a VM is lighter and more stable than running it as a local process. And the GNS3 VM server can handle a variety of devices other than Cisco IOS. Therefore, when using GNS3, it is recommended to use it on a VM server.
This page describes the setup of the GNS3 VM server using VMware Workstation as the virtualization software.
Notice
Personally, I think a local GNS3 server is sufficient if you simply want to emulate Cisco IOS.
GNS3 VM Server Setup Flow
The setup procedure for the GNS3 VM server is as follows
Download the GNS3 VM
Download the GNS3 VM from the official GNS3 website.
Importing GNS VMs into VMware Workstation
Open the downloaded GNS3 VM.ova by clicking “Open Virtual Machine” on VMware.
Set up a GNS3 VM
Set up the GNS3 VM server with the GNS3 setup wizard.
Step1: Download the GNS3 VM
Download the GNS3 VM from the official GNS3 website.
Download GNS3 VM

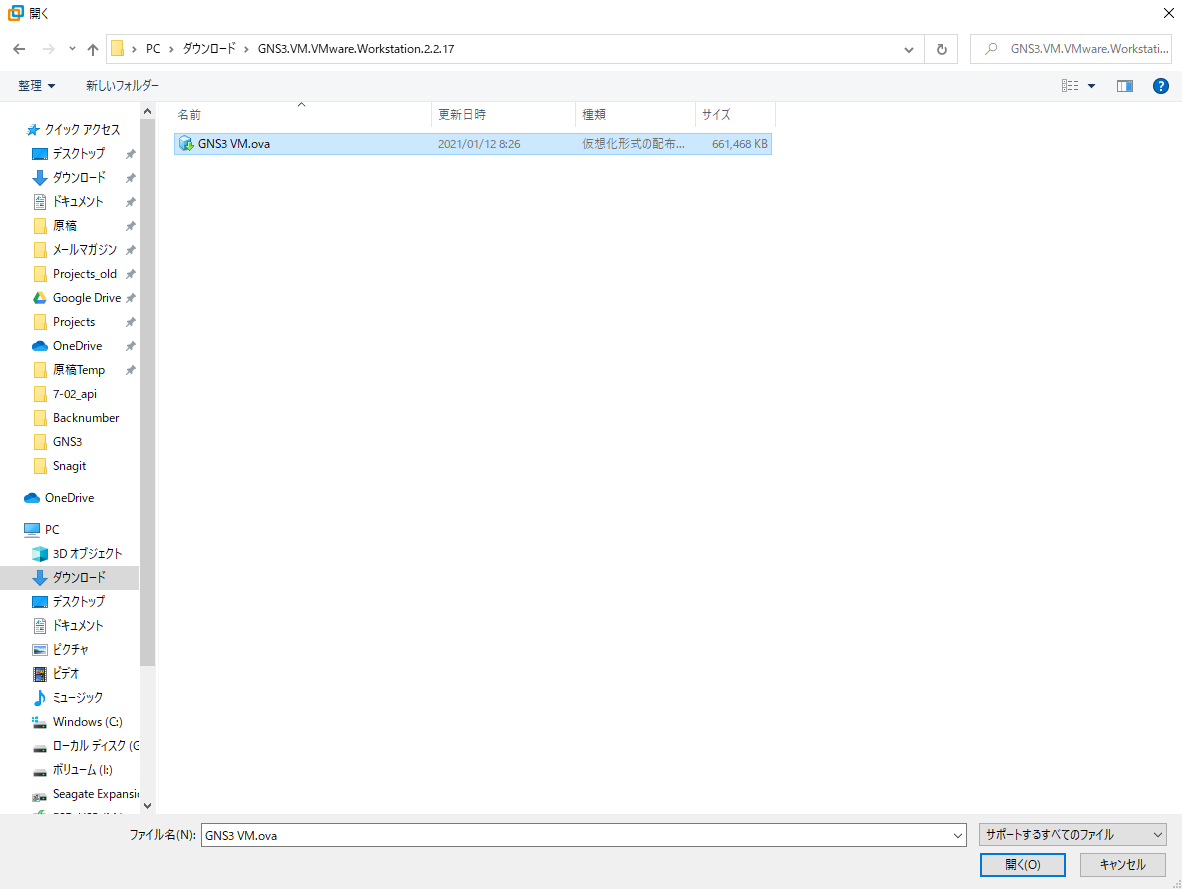
The downloaded file is a zipped file; extract the zip file and you will find the GNS3 VM.ova file, which is a Virtual Machine image.
Step2: [VMware Workstation] Importing GNS VMs into VMware Workstation
This step is done in VMware Workstation, click “Open Virtual Machine” in VMware to open the downloaded GNS3 VM.ova.
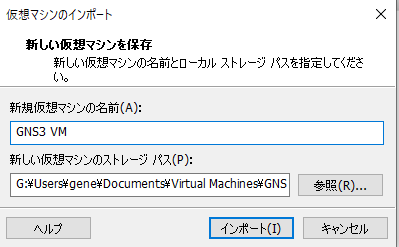
In the [Import Virtual Machine] dialog box, leave the virtual machine name as “GNS3 VM”. Change the storage path as needed. Click [Import] to start importing the virtual machine.
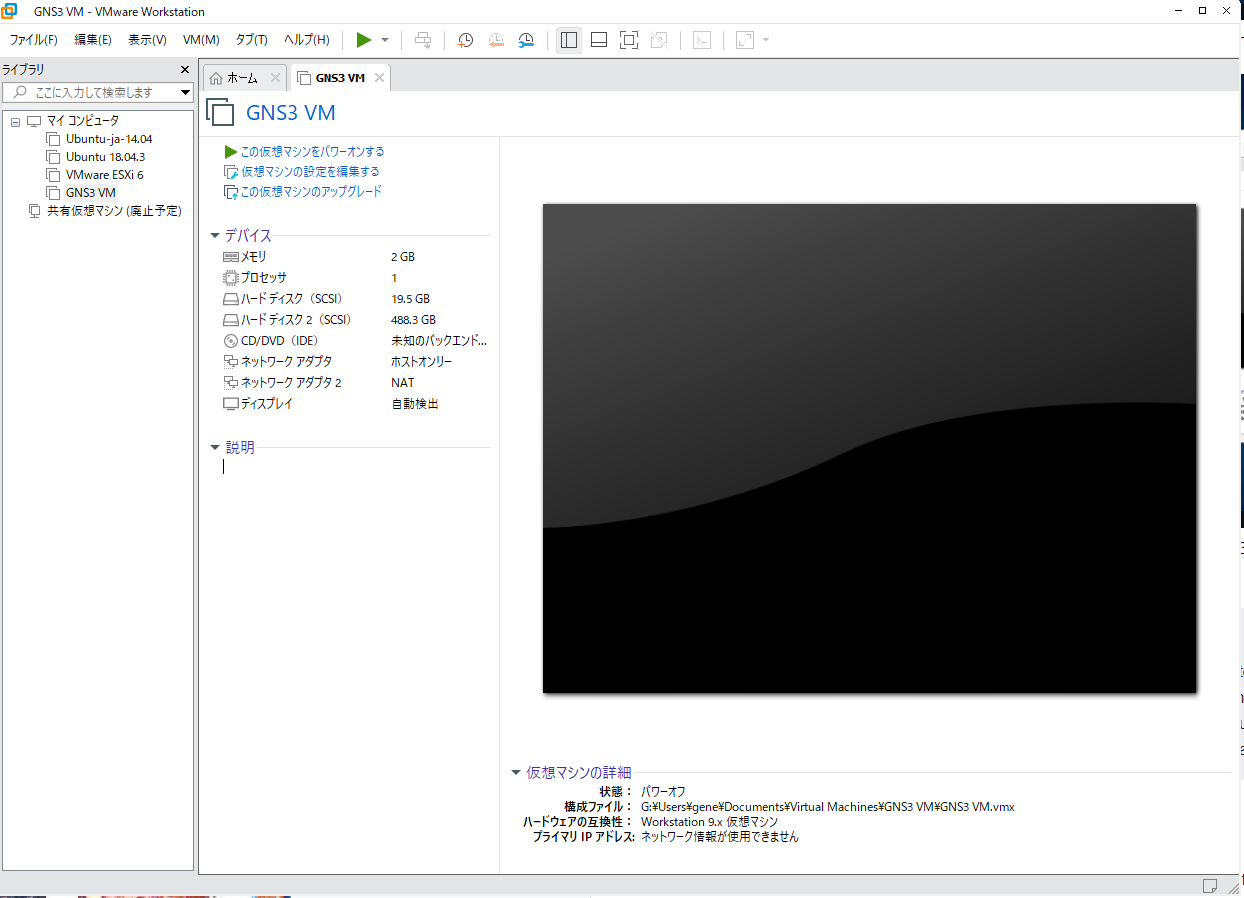
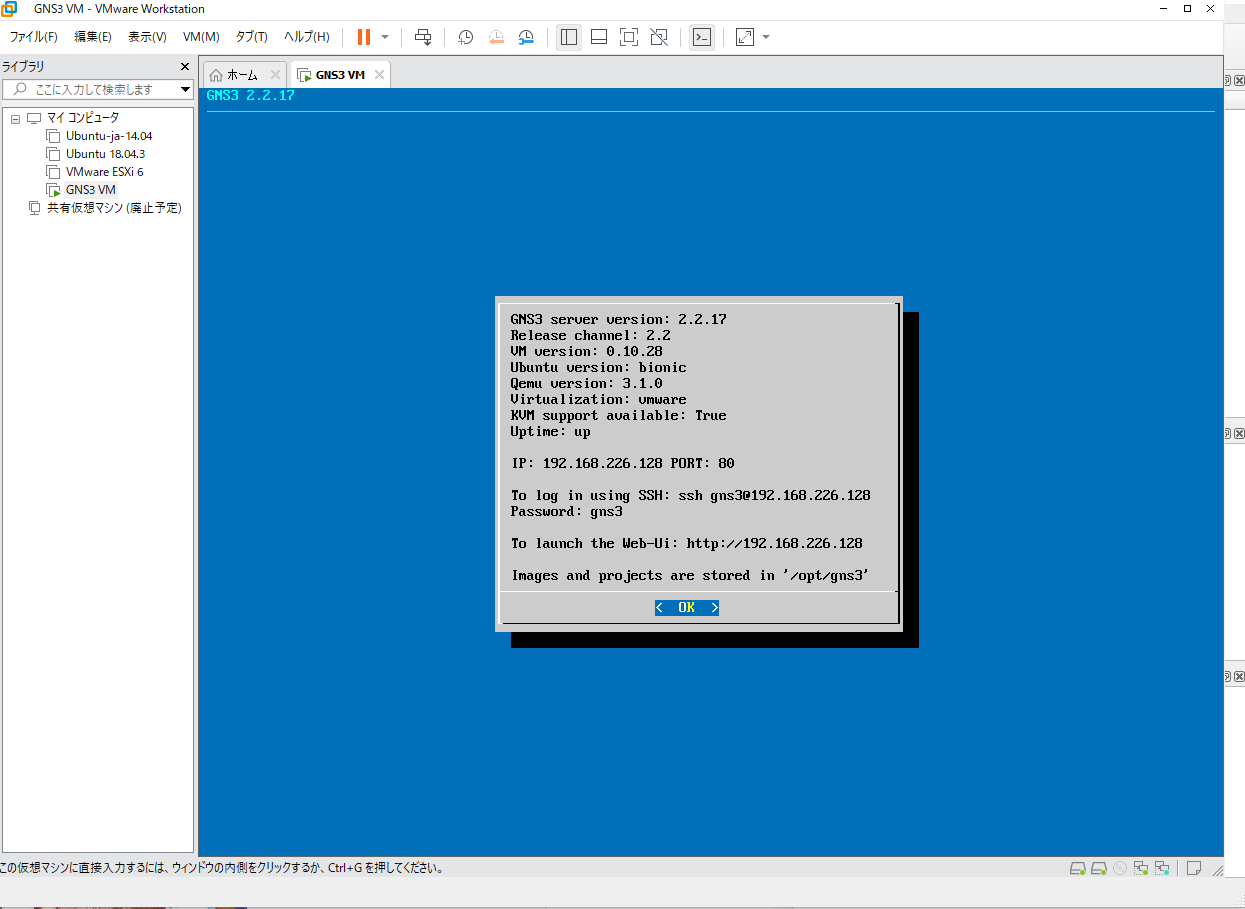
Once the GNS3 VM has been successfully imported, you will see the following.
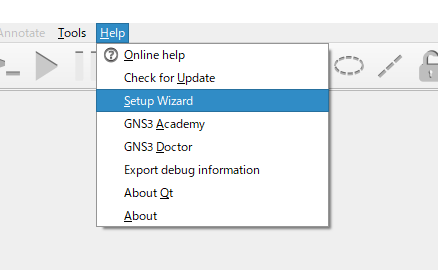
Step3: [GNS3] Set up a GNS3 VM
Set up the imported GNS3 VM server on GNS3. Start the setup wizard from [Help]-[Setup Wizard].
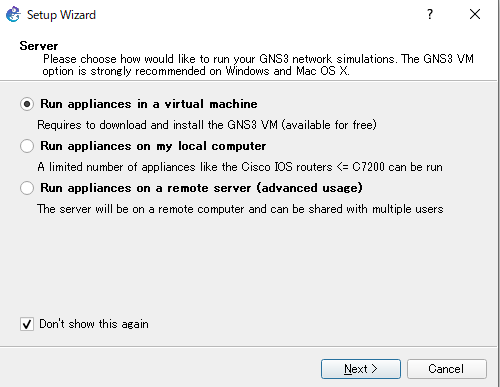
In the setup wizard, select “Run appliances in a virtual machine” and click “Next”.
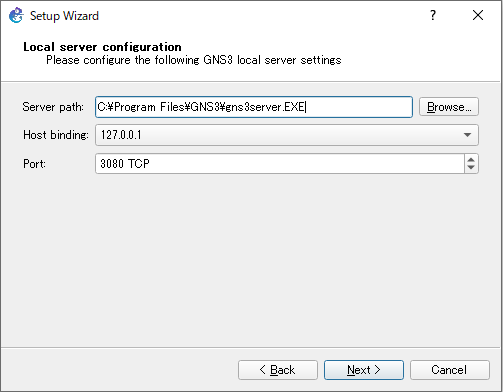
It seems that you also need to configure the local server settings when using the VM server. Under Local Server Configuration, select [127.0.0.1] as the Host Binding and click [Next].
If the local server connection is successful, you will see a screen like the one below. Click “Next” to continue.

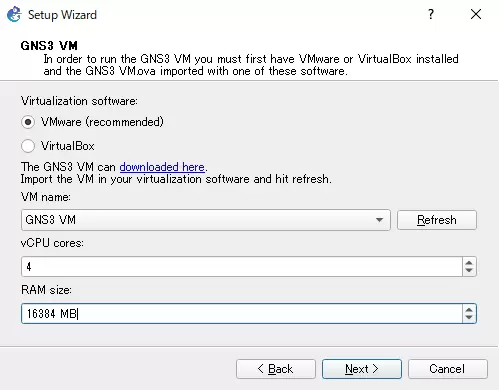
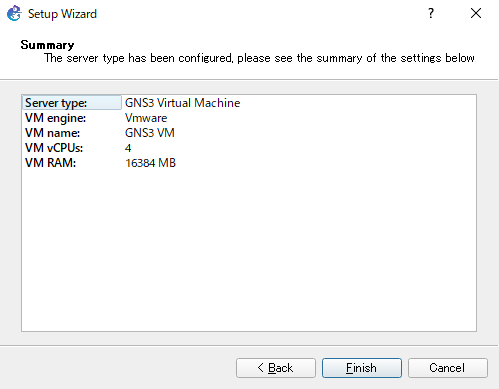
Make sure it is “GNS3 VM”, the Virtual Machine name you imported as [VM name] in [GNS VM]. Also, specify the vCPU and RAM size to be assigned to the GNS3 VM. The minimum configuration is 1vCPU and 2GB. To run a lot of routers, you need more vCPU/RAM size. According to the official site, the approximate rule of thumb is 50% of the number of cores/RAM size of the PC running GNS3.
Click “Next” to continue, VMware will start automatically and the GNS3 VM will be started.
On GNS3, you will see a summary of the setup wizard. Click “Finish” to complete the setup of the GNS3 VM server.
Also, if the GNS3 VM server is working properly, [GNS3 VM] will be green in the [Servers Summary] of GNS3.

関連記事
If [GNS3 VM] does not turn green in [Servers Summary], please check the points in the following article.
How to use GNS3
- Installation of GNS3 (Windows10)
- How to Upgrade GNS3 version
- How to download IOS of the real router to PC
- Creating IOS Router Template
- Setting up the GNS3 VM server
- What to do when GNS3 VM does not turn green in Servers Summary?
- Creating an IOS router template (VM server)
- How to Use IOU(IOS on Unix) on GNS3
- How to Use CSR1000v on GNS3
- Creating GNS3 project
- Link to Host OS
- Example of linking to the host OS
- How to add a VMware virtual machine to a GNS3 topology
- VPCS Configuration and Operation
- How to Add Docker Container Linux Hosts
- How to use FRR (Free Range Routing) container on GNS3
- How to Use GNS3 Appliances
- Managing Snapshots
- Export/Import configuration
- Packet Capture
- Edit startup-config directly
- How to change the Solar-PuTTY font and background color