Table of Contents
Export/Import configuration
You can export the startup-config of the router emulated by GNS3 to a text file. You can also import the exported configuration into the startup-config of the router on GNS3 to restore the configuration easily.
This page explains how to export/import the configuration of the router emulated by GNS3.
How to export configuration
To export the router’s startup-config to a text file, follow the steps below.
- Save running-config to startup-config.
- Export startup-config to a specified folder.
1. Save running-config to startup-config
It is the startup-config that will be exported to a text file. Therefore, the first step is to save the running-config of the router to startup-config. Enter the following command in the router’s console.
#copy running-config startup-config
2. Export startup-config to a specified folder
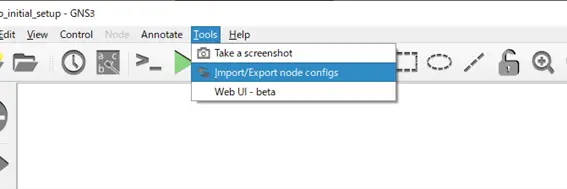
Click [Tools] > [Import/Export node config] in the menu, select [Export configs to a directory], and click [OK].
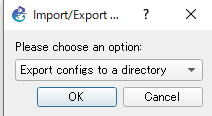
This will bring up a dialog box for you to select a folder. Select the folder you want to export.
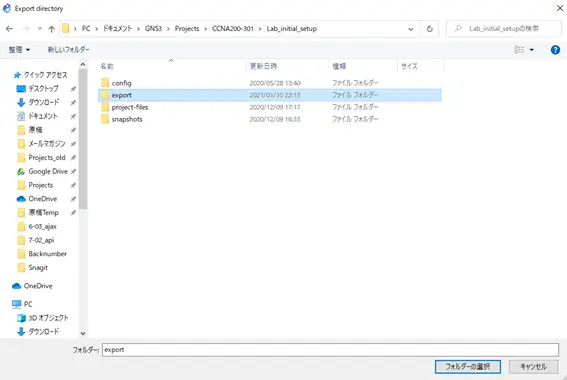
The startup-config of the device on the project will be saved as a text file in the selected folder. The file name is in the format [device name]_configs_i[x]_startup-config.cfg.
[x]:device ID

How to import configuration
The procedure for importing the exported configuration into the router startup-config again is as follows.
- Stop the device.
- Specify the folder where the configuration you want to import is saved.
1. Stop the device
Stop the router before importing the configuration. It is possible to import the config while the router is running. However, since the running-config is not changed, you need to reboot the router to reflect the imported configuration. For this reason, it is better to stop it when importing.
2. Specify the folder where the configuration you want to import is saved.
Click [Tools] > [Import/Export node config] in the menu, select [Import configs to a directory], and click [OK].
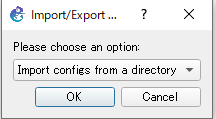
A dialog box for selecting a folder will appear. Select the folder where the configuration you want to import is saved.
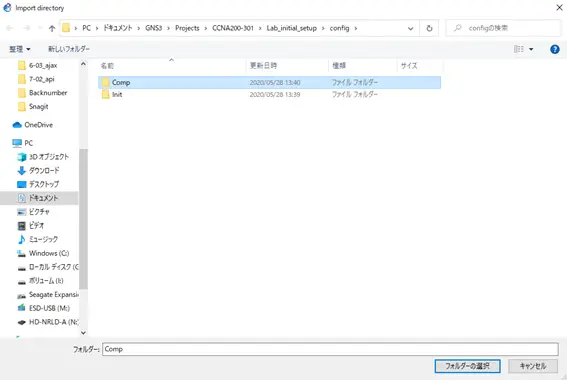
Note that the file name of the configuration must be in the following format when it is exported.
[devicename]_configs_i[x]_startup-config.cfg
[x]:device ID
Notice
A warning message such as “private-config.cfg not found” may appear on the console during import. private-config.cfg stores the RSA encryption key and other information when SSH is configured. There is no need to worry about this for devices without SSH settings.
How to use GNS3
- Installation of GNS3 (Windows10)
- How to Upgrade GNS3 version
- How to download IOS of the real router to PC
- Creating IOS Router Template
- Setting up the GNS3 VM server
- What to do when GNS3 VM does not turn green in Servers Summary?
- Creating an IOS router template (VM server)
- How to Use IOU(IOS on Unix) on GNS3
- How to Use CSR1000v on GNS3
- Creating GNS3 project
- Link to Host OS
- Example of linking to the host OS
- How to add a VMware virtual machine to a GNS3 topology
- VPCS Configuration and Operation
- How to Add Docker Container Linux Hosts
- How to use FRR (Free Range Routing) container on GNS3
- How to Use GNS3 Appliances
- Managing Snapshots
- Export/Import configuration
- Packet Capture
- Edit startup-config directly
- How to change the Solar-PuTTY font and background color