Table of Contents
Snapshot
Snapshots of a GNS3 project allow you to save the network diagram and configuration of each device at a specific point in time. These snapshots give you the flexibility to manage changes to your network configuration and settings.
Creating a snapshot
The steps to create a snapshot are as follows
Step1:Saving configuration of each device
Step2:Stop each device.
Step3:Create a snapshot
Step1:Saving configuration of each device
Save the configuration of each device before creating a snapshot. Save the configuration from the CLI with the copy running-config startup-config command.
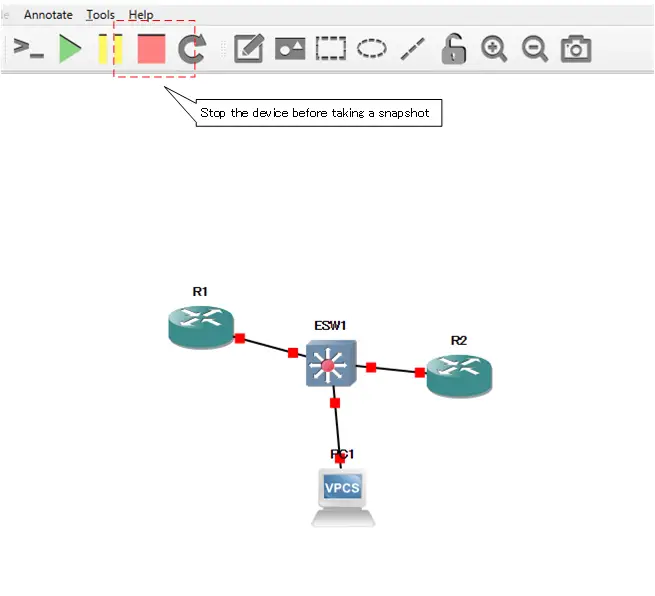
Step2:Stop each device
Snapshots cannot be taken while the emulating device is running. Please stop the device once you have saved the configuration.
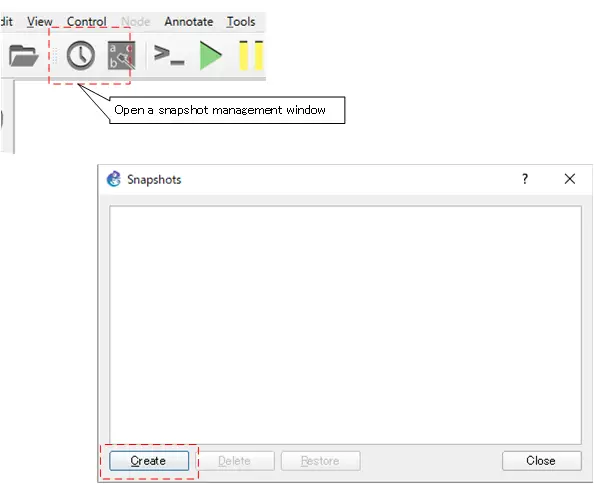
Step3:Create a snapshot
Use the [Manage Snapshot] button to open the snapshot management screen and click [Create].
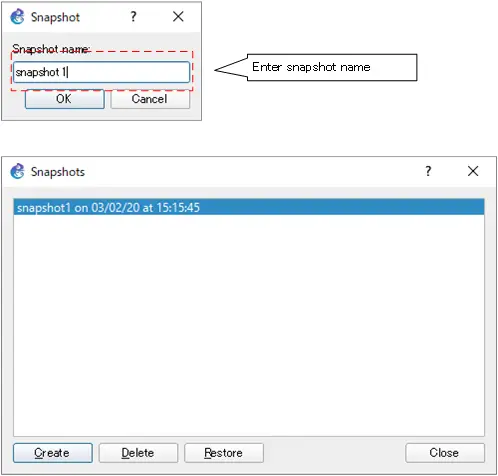
Enter any snapshot name and click [OK] to create a snapshot at that point.
The snapshot is stored as a portable project in the following path
[GNS3 project path]\snapshots\<snapshotname>_DDMMYY_XXXXXX.gns3project
Creating a snapshot means you are exporting it as a portable project to the path above.

Restore Snapshots
The procedure for restoring a project from a snapshot of a specific point in time is as follows
Step1:Launch the GNS3 project that is making a snapshot
Step2:Restore from Snapshot
Step1:Launch the GNS3 project that is making a snapshot
To restore a snapshot, you can do it from the GNS3 project where you created the snapshot. Please start the corresponding GNS3 project.
Step2:Restore from Snapshot
From the Snapshot Management window, select the snapshot you want to restore and click [Restore].
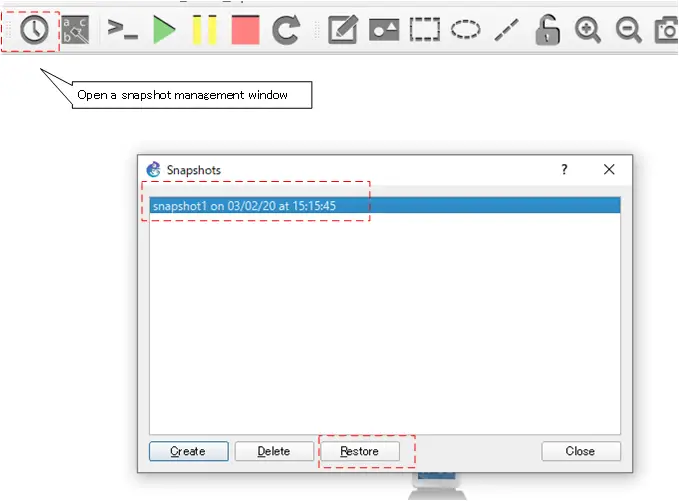
When restored, each device’s configuration will return to the point at which the snapshot was taken.
Importing a snapshot as a new project
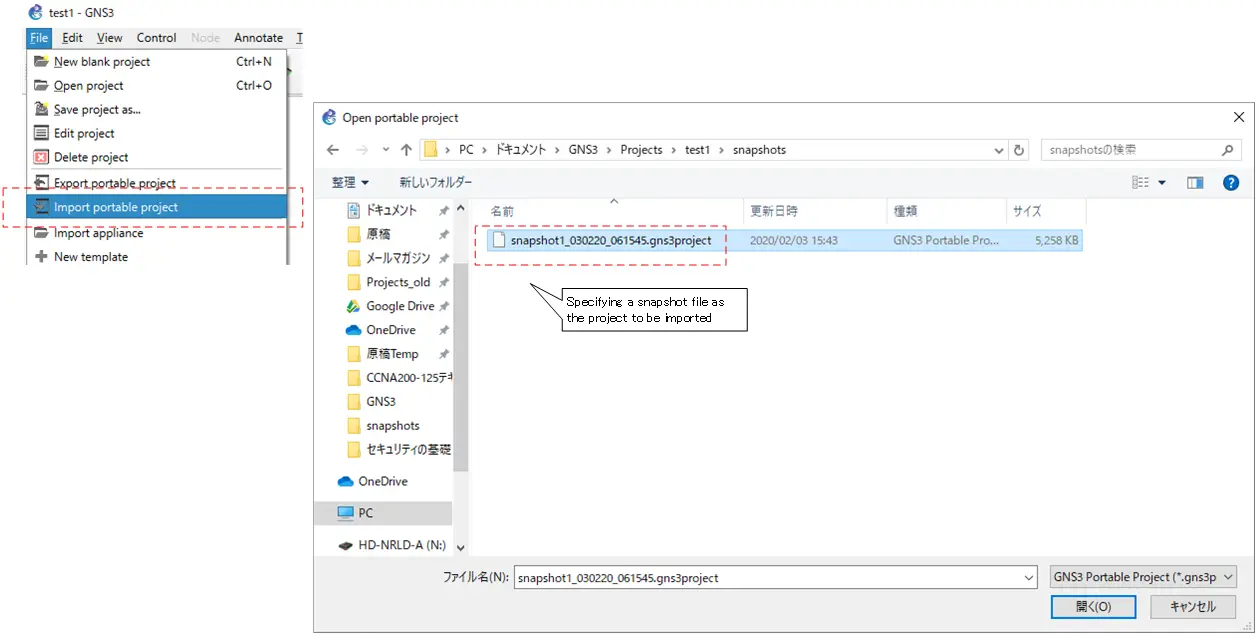
If you import a snapshot .gn3project file, you can also restore it as a new project. Go to [File]→[Import portable project] and specify the .gnsproject file of the snapshot to be imported.
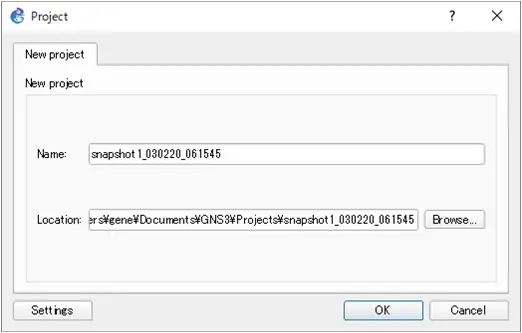
When you import, a new project is created and the project name is the default snapshot file name. Change it if necessary.
How to use GNS3
- Installation of GNS3 (Windows10)
- How to Upgrade GNS3 version
- How to download IOS of the real router to PC
- Creating IOS Router Template
- Setting up the GNS3 VM server
- What to do when GNS3 VM does not turn green in Servers Summary?
- Creating an IOS router template (VM server)
- How to Use IOU(IOS on Unix) on GNS3
- How to Use CSR1000v on GNS3
- Creating GNS3 project
- Link to Host OS
- Example of linking to the host OS
- How to add a VMware virtual machine to a GNS3 topology
- VPCS Configuration and Operation
- How to Add Docker Container Linux Hosts
- How to use FRR (Free Range Routing) container on GNS3
- How to Use GNS3 Appliances
- Managing Snapshots
- Export/Import configuration
- Packet Capture
- Edit startup-config directly
- How to change the Solar-PuTTY font and background color